How to Wire a Light Bar
So, you’re thinking about adding a light bar, eh? I’m not here to get all ominous and foreboding — like that hardened one-legged sailor telling you not to take your ship to Devil’s Reef — but for the amateur, light bars can be a bit deceptive. You see one on top of a Jeep at the grocery store and think to yourself I could do that. But soon you’ve plunked down several hundred dollars only to find out you need to drill holes in your roof, pull up weather stripping, and you haven’t the foggiest idea what a relay is for.
Light bars are a great addition to any off-road or work rig, but if you haven’t done much in the way of wiring and know little about automotive electrical systems, you can get in over your head fast. But do a little planning, research, and due diligence and this will be like any other DIY project you’ve tackled and accomplished before.
Let’s take a look at the basics of installing an aftermarket lighting bar.
Before You Start…
Before starting with a light bar installation — or any substantial aftermarket undertaking — we recommend a few basic preparations.
Map out your time and start early.
How many times have you told yourself, friends, or family members a car project should only take an hour or two only to still be working on it a week later. We don’t want to fear-monger, but things go wrong, pieces break, and tools/parts you don’t have are often needed. Give yourself plenty of time. Your kids won’t be happy sitting at soccer practice waiting for you to put your car back together because you overestimated your capability.
Prep your vehicle and workstation.
While it’s not necessary to get your vehicle professionally detailed before an install, a clean car is certainly easier to work on than a dirty one. The same goes for your workspace — whether it be blowing out dirt from your garage or sweeping those rocks out of your driveway.

Plan out the install.
Figure out where you’ll be drilling holes, mounting brackets, and routing wires. Take some time and visit message boards or forums that have other users of your equipment and/or vehicle. This will certainly tamp out any large surprises you might face. Print out/download anything you may want to keep handy, like pictures and diagrams. And like we’ll mention later, learn the parts of a wiring harness and what they do. Having a solid idea of where your wires will be routed saves a ton of time.
Gather the tools you’ll need for the installation.
While each light bar is unique and may require a slightly different set of supplies, you’ll usually need sockets, a drill, tape measure, and electrical tape. Please consult your light bar manual for a complete list.
Unbox and inspect your equipment.
We put this last on our prep list, but really it should be first. For a gearhead, there are few things worse that spending time prepping and removing parts from a vehicle only to find out that something is missing, broken, or doesn’t fit. Reduce the chance of this happening by unboxing the part, giving it a thorough inspection and checking that what’s inside matches the packing list.
Measuring, Marking and Drilling
After completing the prep work, you should know what position you’ll be mounting your bar.
Quite possibly the most intimidating part of any light bar install is drilling your holes. So, take your time, measure everything two…three…four times, step away for a minute, measure again and make your marks to drill. The same process goes for a light bar that is foot-mounted or bracket mounted.
Some bars have several different ways to mount, so make sure to choose the method that best suits your needs or vehicle.

Using scotch tape as a surface to mark on, rather than the vehicle itself will make marks easier to see and help protect surrounding paint. Ensure nothing is behind these marks that could be damaged in the process. Then, take a deep breath and drill the appropriately-sized holes. If you’re mounting to an existing bracket or bar, this process is much easier.
Connecting/Routing the Wires and Harness
Drilling may be the most anxiety-inducing part, but for novices the function and setup of the wiring harness may be the most confusing.
Like we said earlier, learn the parts of a wiring harness and their purpose. This way, things will make a lot more sense when you open the box and lay everything out for the first time. You’ll generally have a relay, a fuse, a switch, and battery/ground/light connections.
Firstly, you’ll pass the harness through the firewall of your vehicle. (Using the path of existing wires is easiest.) Make sure the wires are not exposed to any sharp sheet metal of the body that could cut or puncture the wire sleeve — use rubber grommets if necessary.
We then recommend getting your switch loosely situated in the cabin of your vehicle. From there, route your wires and find good spots to situate your relay and fuse. Be sure not to pull too hard on any wires without knowing what it will do to your connections first. We recommend loosely routing everything first, and then tightening everything up once the final route is confirmed.
Finally, connect your battery and ground wire terminals. Testing the light out before tucking everything away is recommended.
Firmly Mount the Switch
Once functionality is confirmed, it’s time to formally mount your on/off switch in the vehicle.
Depending on your model/trim, you may have some removable blank switches made for just this situation. You can certainly use the switch most likely included with your bar, but getting an aftermarket switch to match the rest of those in your interior is a more aesthetic option.
If you don’t have a clear option, you can mount it out of sight without modification, or drill out a hole in your dash for a convenient flush fit.
Adjust your Angle
Once your light bar powers on, take your vehicle to a situation where you’ll most likely use it.
From there, you can position the angle of the bar to throw more light directly in front of you, ahead of you, or any other direction you desire and the mount can accommodate.
Double Check Work and Monitor
After situating your bar, make sure to tighten down all the screws.
For the next several uses of the bar, monitor a few things. Is anything loosening? Is something getting too hot? How’s my battery handling the new addition? Is any moisture or condensation getting into my light or the holes I drilled?
While most people will set it and forget it, it’s important to monitor how your new gear is working and interacting with the environment and vehicle around it.
Sponsored by TrailFX
Lighting is a tricky place to allocate your hard-earned money. Spend too much on a bar and you’re left with little for other accessories. But skimp out and you’ll not only need to quickly replace, but also leave your vehicle open to the damage cheap wiring can cause. The folks over at TrailFX hit a great sweet spot with their extensive lineup of lighting accessories — high-performance, long-lasting equipment at a price the big guys just can’t touch.

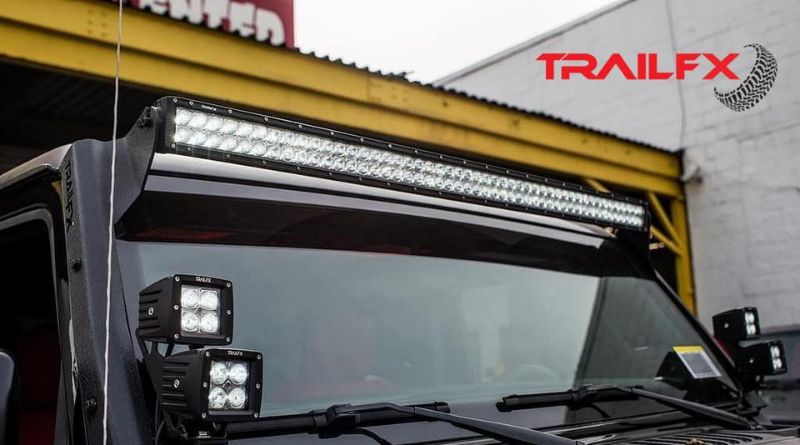
Take the ever-popular 50″ light bar, which fits perfectly on the roof of many popular trucks and SUVs.
You can easily spend $1,000+ on a unit with bells, whistles, and technology you’ll likely never use. In the same vein, you can easily find a $60 bar that looks fine in pictures – but leave your car in the driveway overnight while your neighbor four houses down turns on their sprinkler system, and boom…you’ve got condensation inside your bar which will look, perform, and last poorly. With TrailFX, you get the best of both worlds, an affordable bar with CREE bulbs, a durable polycarbonate lens, sturdy aluminum housing, a wiring harness, and all the bracketry and hardware necessary.
Plus, with IP67 dust, sand, and dirt protection, as well as 30K+ hours of working life, TrailFX bars are engineered for the long haul — built to be able to move from one vehicle to your next.
With many popular sizes including 50″, 30″, and smaller 10″, 7″, and 5″, TrailFX has a lighting solution to suit your needs. Equip your roof, hood, and bumper with lighting all at a price less than what the expensive brands charge for a single bar — and all while having the peace of mind that TrailFX lighting will be ready to go when and where you are, hour after hour, mile after mile.
To learn more about TrailFX LED lighting solutions, visit www.trailfx.com


